pGina is a pluggable, open-source credential provider (and GINA) replacement. It allows for alternate methods of interactive user authentication and access management on machines running the Windows operating system.
Download and install pGina stable version setup from (github.com/pgina/pgina/releases/v3.1.8.0)
This configuration was performed within a virtual box.
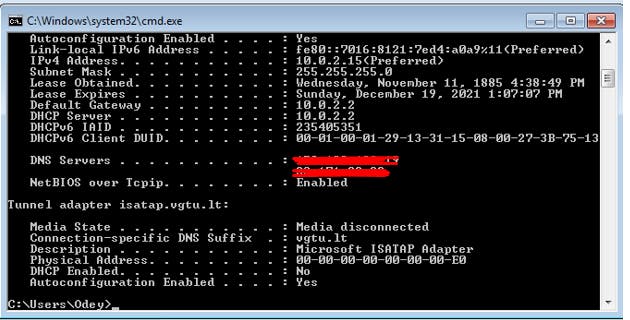
To start check/verify the IP of your windows machine using ***ipconfig ***
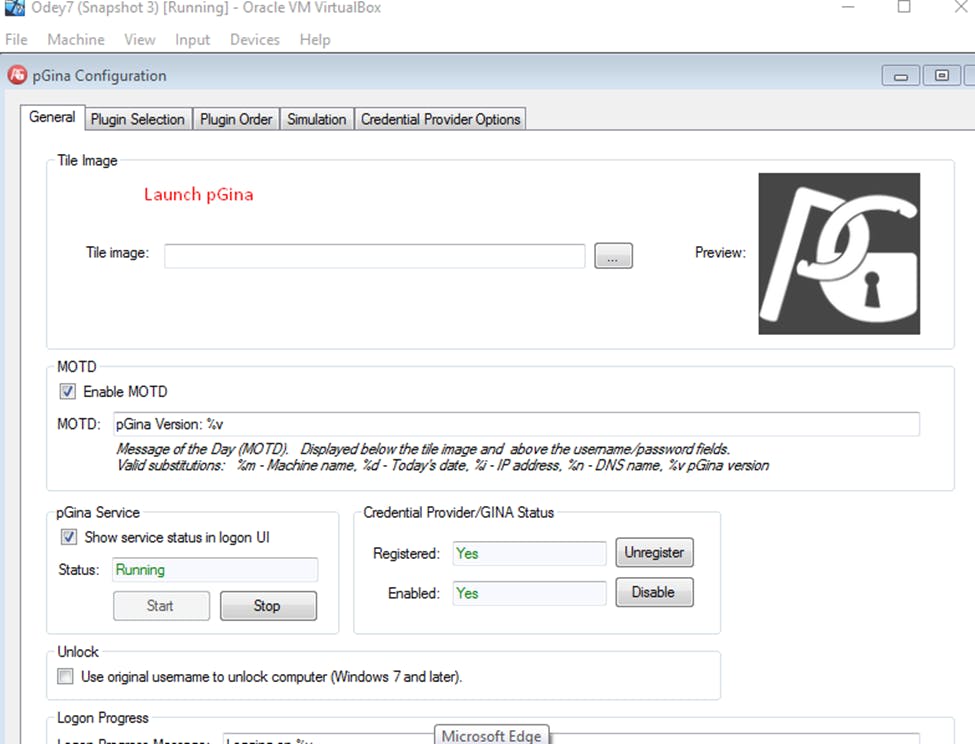
After installation of pGina, launch pGina application.
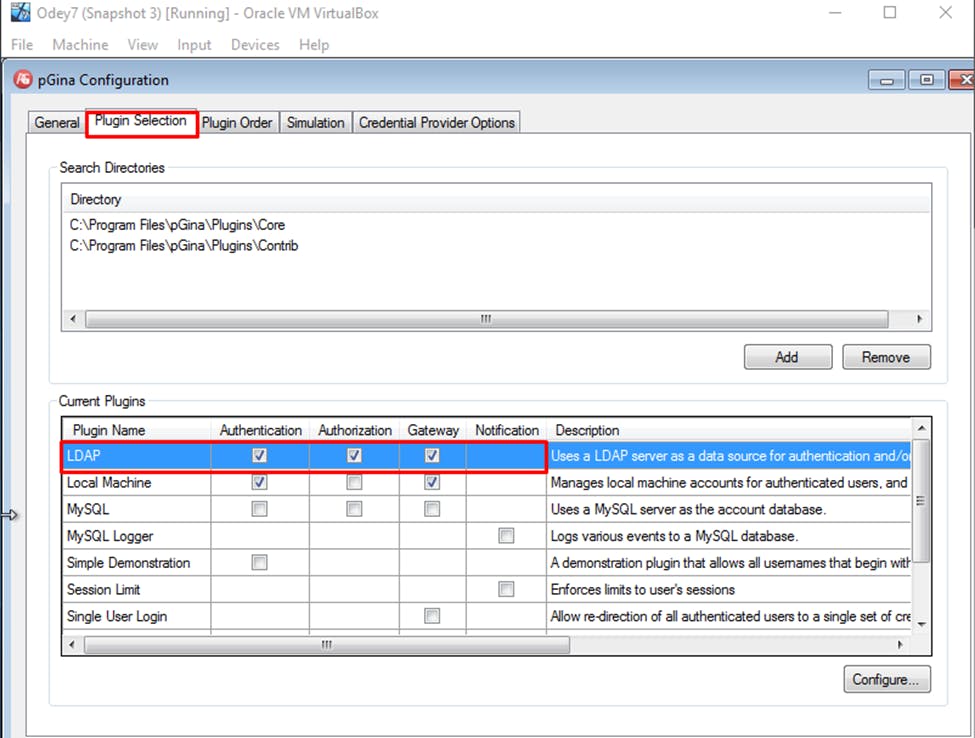
Click on Plugin selection and check all 3 boxes as shown in the image below. Plugin Name: LDAP: Authentication, Authorization and Gateway, then click on configure to continue the set-up.
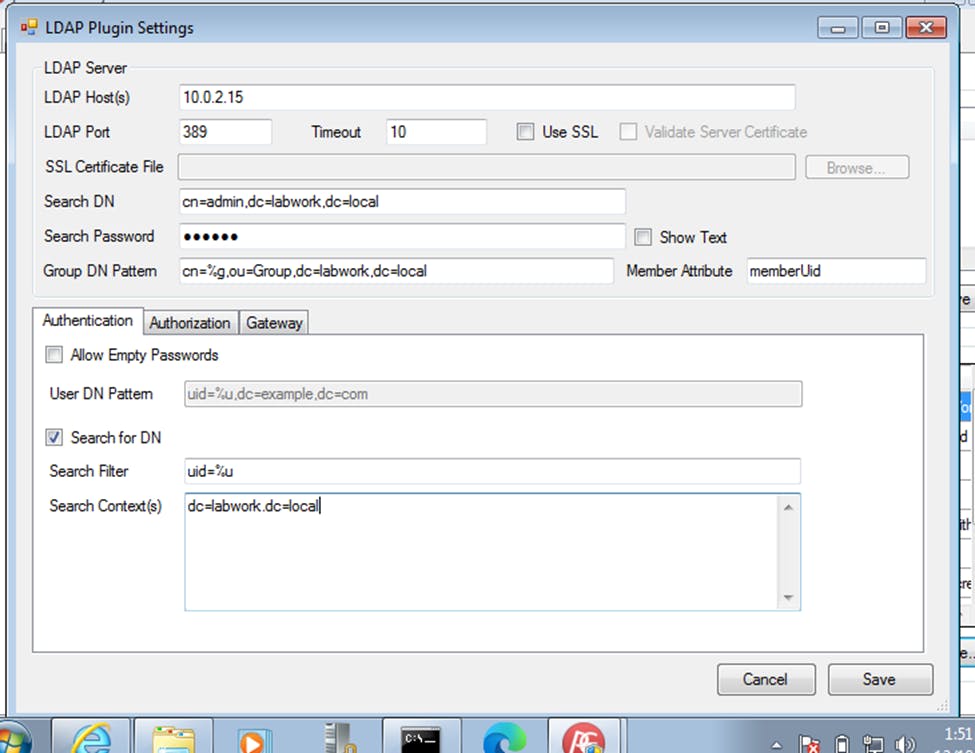
Fill in the required information.
For LDAP host, we use the IP of or machine 10.0.2.15 which is advisable to use in case you make a mistake the hostname and users would be unable to access.
For the LDAP Port, we do not require to make any changes to the port.
Edit the Search DN and edit the required information and replace it with your own ldap server details dc=labwork,dc=local. Fill in the rest as shown and click on save.
Click on Plugin Order, select the LDAP plugin and use the arrow provided to move it to the top.

Click on the Simulation tab next as we would try to simulate using an actual user to check if our set-up is correct.
Here we use the user which is the name attached to your machine upon creation and the password of the machine.

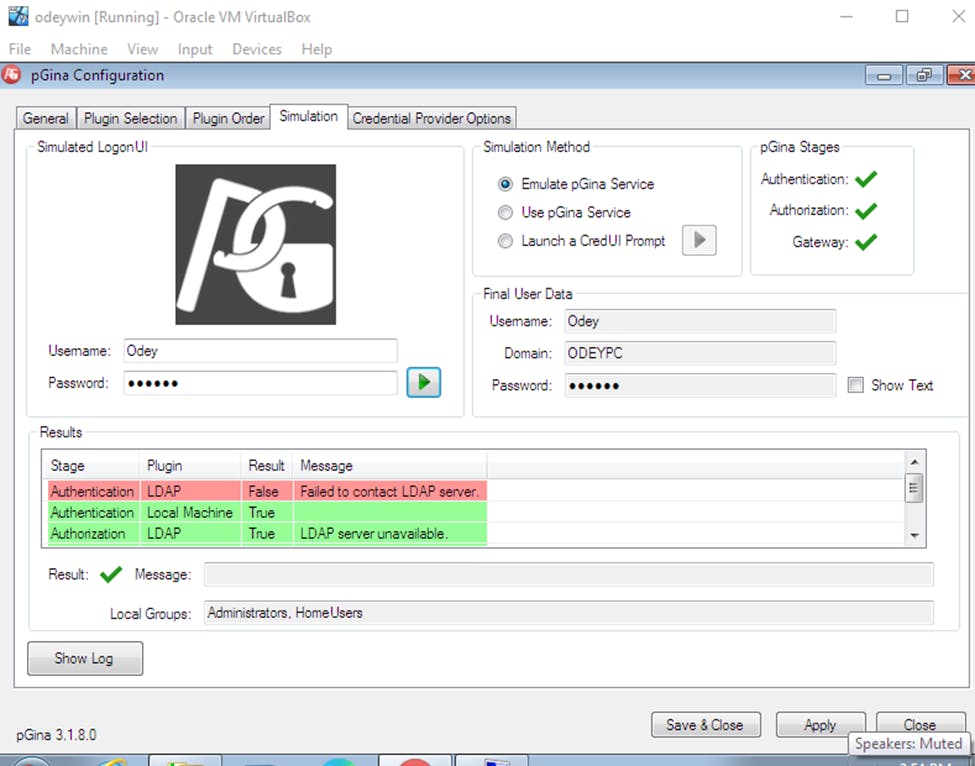
Then you can click on apply and save & close. Shut down your machine and try logging in with the user as used in the simulation.

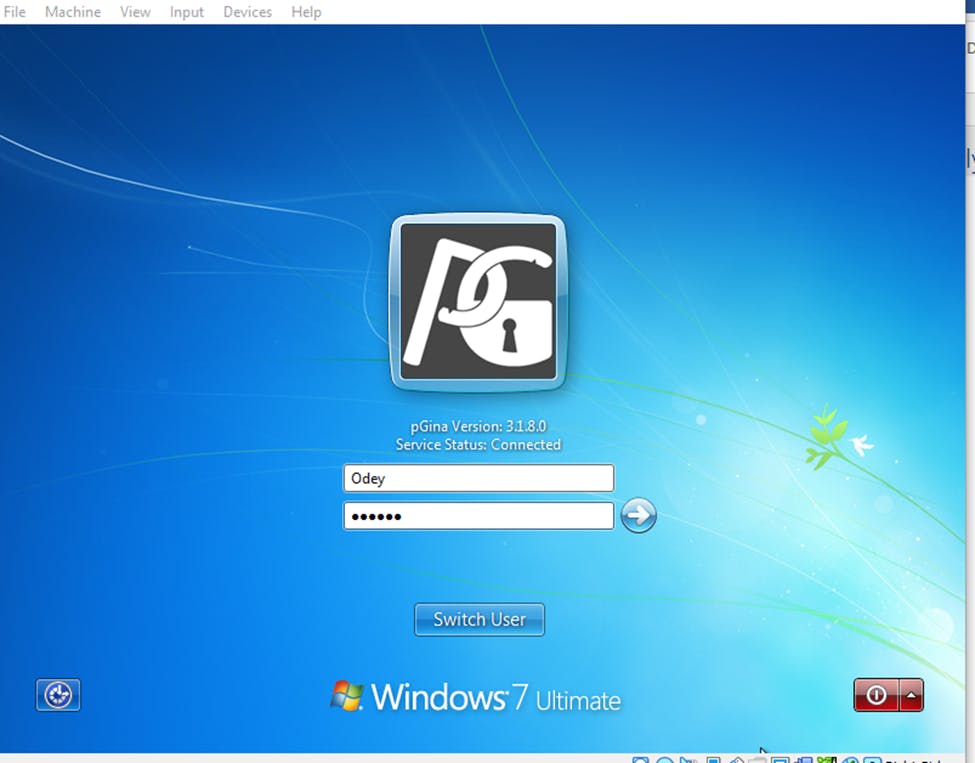
Conclusion
You are now ready to use pGina to log into Windows machines!

