We will learn how to install and configure OpenLDAP Server on Ubuntu 20.04. OpenLDAP Software is an open-source Lightweight Directory Access Protocol implementation. LDAP is a simple client-server protocol used to access directory services, specifically X. 500-based directory services steps.
INSTALLING OPENLDAP.
We begin by installing the latest update of packages Sudo apt-get update -y
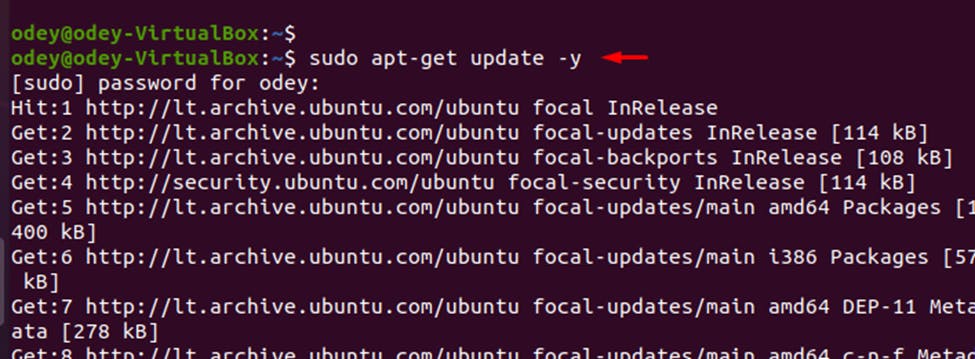
Install Sldap and other LDAP utilizes with command Sudo apt-get install slapd ldap-utlis During installation, you would be asked to set up admin password
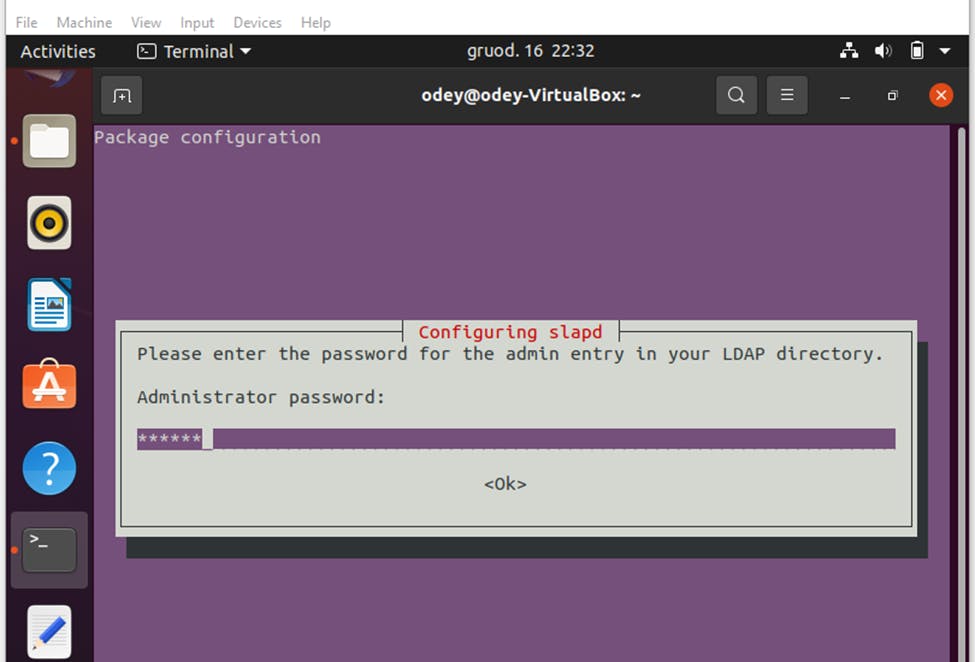
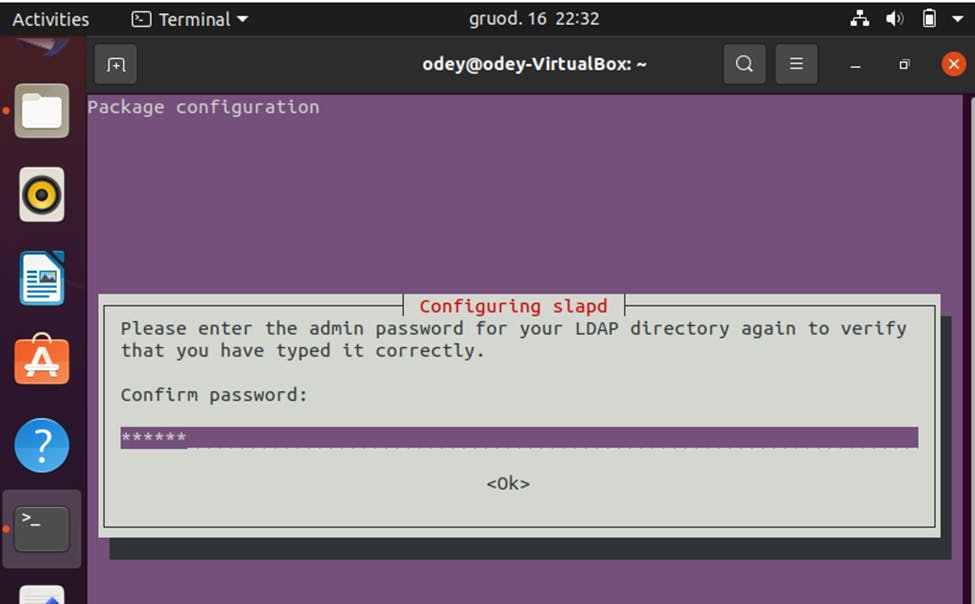
Once the installation has been completed, you would configure SLAPD package and set your domain with the command dpkg-reconfigure slapd
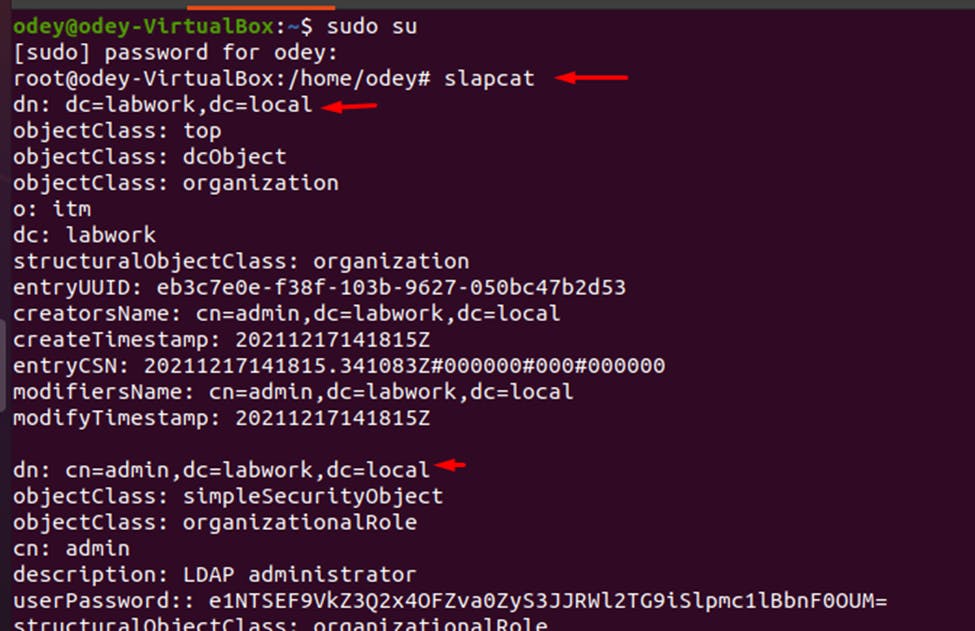
Verify your LDAP information using slapcat
dn: dc=labwork,dc=local objectClass: top objectClass: dcObject objectClass: organization o: itm dc: labwork
Creating OU (organization unit) to store users with the command nano users-ou.ldif Add the below lines and save using ctrl +O
dn: ou=people,dc=local,dc=local objectClass: organizationalUnit objectClass: top ou: people
dn: ou=groups,dc=labwork,dc=local objectClass: organizationalUnit objectClass: top ou: groups exit using ctrl +X after saving

Adjust the SLAPD database access controls by creating the following file: nano update-mdb-acl.ldif
Add the below lines and save using ctrl +O
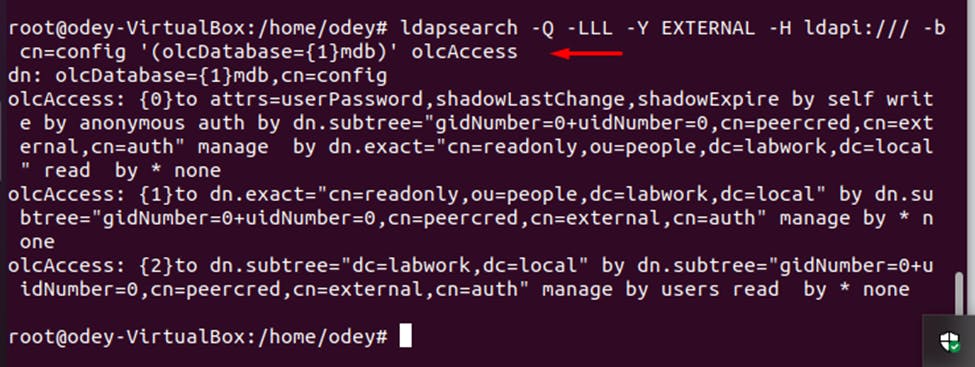
dn: olcDatabase={1}mdb,cn=config changetype: modify replace: olcAccess olcAccess: to attrs=userPassword,shadowLastChange,shadowExpire by self write by anonymous auth by dn.subtree="gidNumber=0+uidNumber=0,cn=peercred,cn=external,cn=auth" manage by dn.exact="cn=readonly,ou=people,dc=labwork,dc=local" read by none olcAccess: to dn.exact="cn=readonly,ou=people,dc=labwork,dc=local" by dn.subtree="gidNumber=0+uidNumber=0,cn=peercred,cn=external,cn=auth" manage by none olcAccess: to dn.subtree="dc=labwork,dc=local" by dn.subtree="gidNumber=0+uidNumber=0,cn=peercred,cn=external,cn=auth" manage by users read by none *exit using ctrl +X after saving

Update database ACL with the above information by running the following command: ldapadd -Y EXTERNAL -H ldapi:/// -f update-mdb-acl.ldif

update the database with the user OU information by running the following command: ldapadd -Y EXTERNAL -H ldapi:/// -f users-ou.ldif

Create a new user account named hiteshj by creating the following file: nano hitesh.ldif
Add the following lines: dn: uid=hiteshj,ou=people,dc=labwork,dc=local objectClass: inetOrgPerson objectClass: posixAccount objectClass: shadowAccount uid: hiteshj cn: Hitesh sn: Jethva loginShell: /bin/bash uidNumber: 10000 gidNumber: 10000 homeDirectory: /home/hiteshj shadowMax: 60 shadowMin: 1 shadowWarning: 7 shadowInactive: 7 shadowLastChange: 0
dn: cn=hiteshj,ou=groups,dc=labwork,dc=local objectClass: posixGroup cn: hiteshj gidNumber: 10000 memberUid: hiteshj
Save and close the file then add the user to the database with the following command: ldapadd -Y EXTERNAL -H ldapi:/// -f hitesh.ldif
Next, you will need to set the password for the user. You can set it with the following command: ldappasswd -H ldapi:/// -Y EXTERNAL -S "uid=hiteshj,ou=people,dc=example,dc=com"
Create OpenLDAP Bind DN
You will need to define username and password for querying the directory server. First, generate the password hash for the bind DN user using the following command: slappasswd

You should get the following output

Next, create a Bind DN name readonly with the following command: nano readonly-user.ldif

Add the following lines:
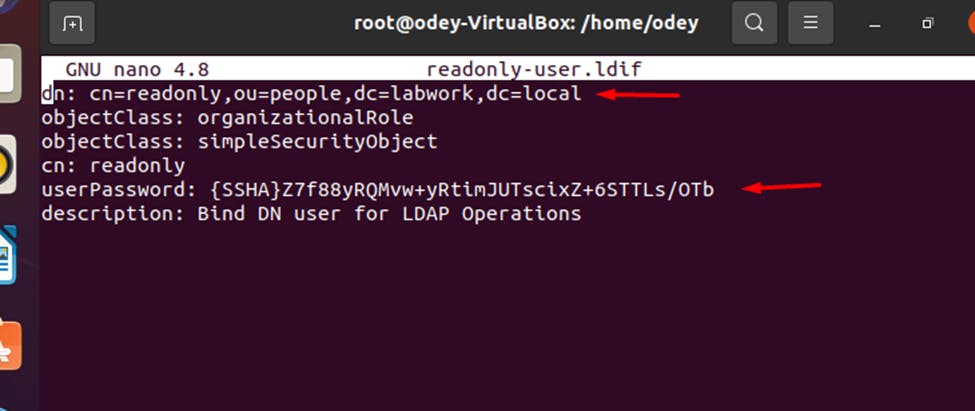
Save and close the file when you are finished then add the BIND user to the database with the following command: ldapadd -Y EXTERNAL -H ldapi:/// -f readonly-user.ldif

Next, verify the Bind DN ACL with the following command: ldapsearch -Q -LLL -Y EXTERNAL -H ldapi:/// -b cn=config '(olcDatabase={1}mdb)' olcAccess
Install and Configure phpLDAPadmin.
By default, phpLDAPadmin package is available in the Ubuntu 20.04 default repository. You can install it by running the following command: apt-get install phpldapadmin -y

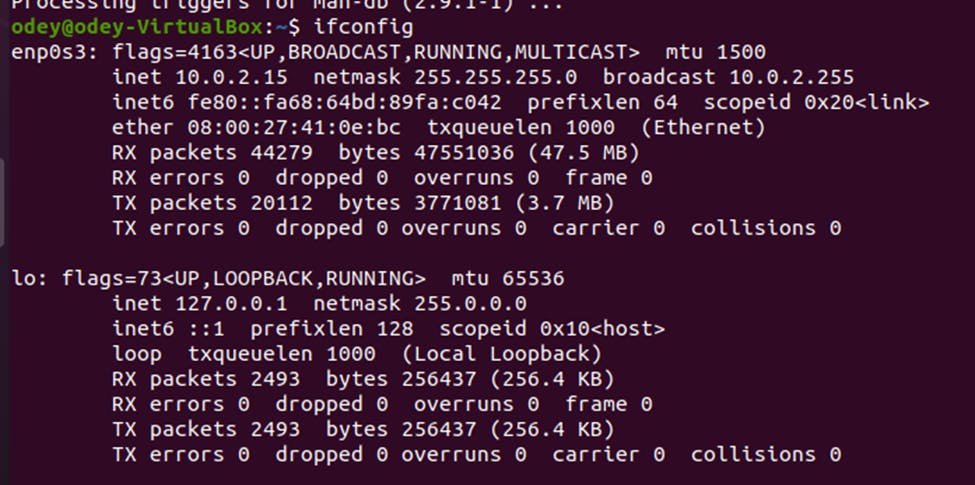
Check for the IP using command Ifconfig to allow you make necessary changes in the next phase.
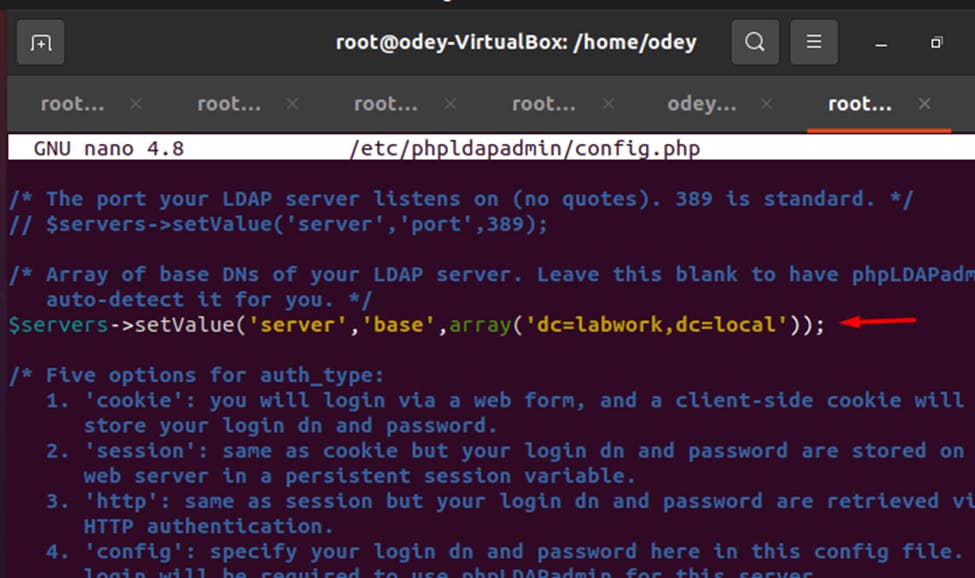
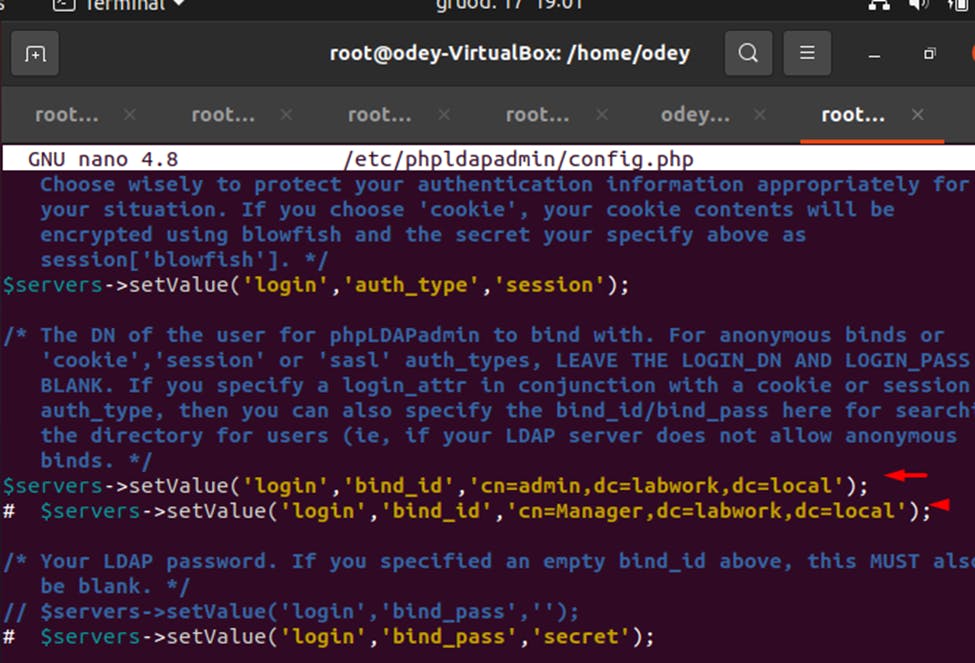
After installing phpLDAPadmin, you will need to configure phpLDAPadmin and define your domain information. You can do it by editing the file /etc/phpldapadmin/config.php: nano /etc/phpldapadmin/config.php
Change the following lines:
$servers->setValue('server','name','My LDAP Server'); $servers->setValue('server','host','69.87.216.102'); $servers->;setValue('server','base',array('dc=labwork,dc=local')); $servers->setValue('login','auth_type','session'); $servers->setValue('login','bind_id','cn=admin,dc=labwork,dc=local'); $servers->setValue('auto_number','min',array('uidNumber'=>10000,'gidNumber'=>10000));
Save and close the file when you are finished.

Install and Configure Apache for phpLDAPadmin
phpLDAPadmin default configuration file for Apache is located at /etc/apache2/conf-available/phpldapadmin.conf. Don't make any changes and go with default settings.
Next, disable the default Apache virtual host configuration file and restart the Apache service to apply the changes: a2dissite 000-default.conf systemctl restart apache2

Access phpLDAPadmin Web UI
Now, open your web browser and access the phpLDAPadmin using the URL 10.0.2.15/phpldapadmin
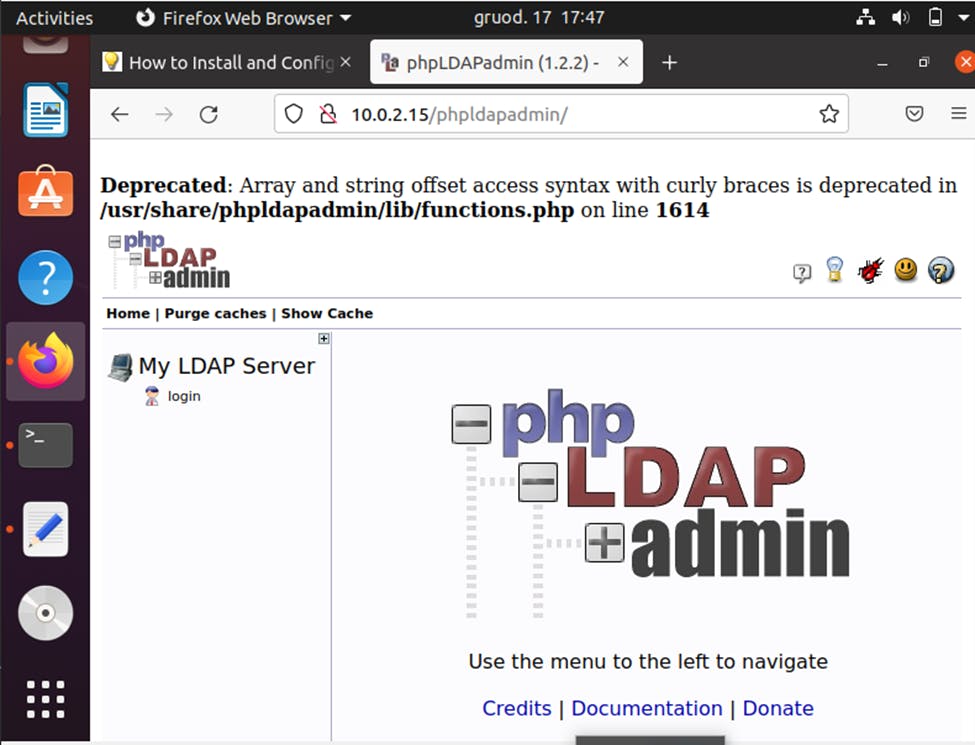
NOTE: For you the IP may be different, so take note so as to use the correct IP.
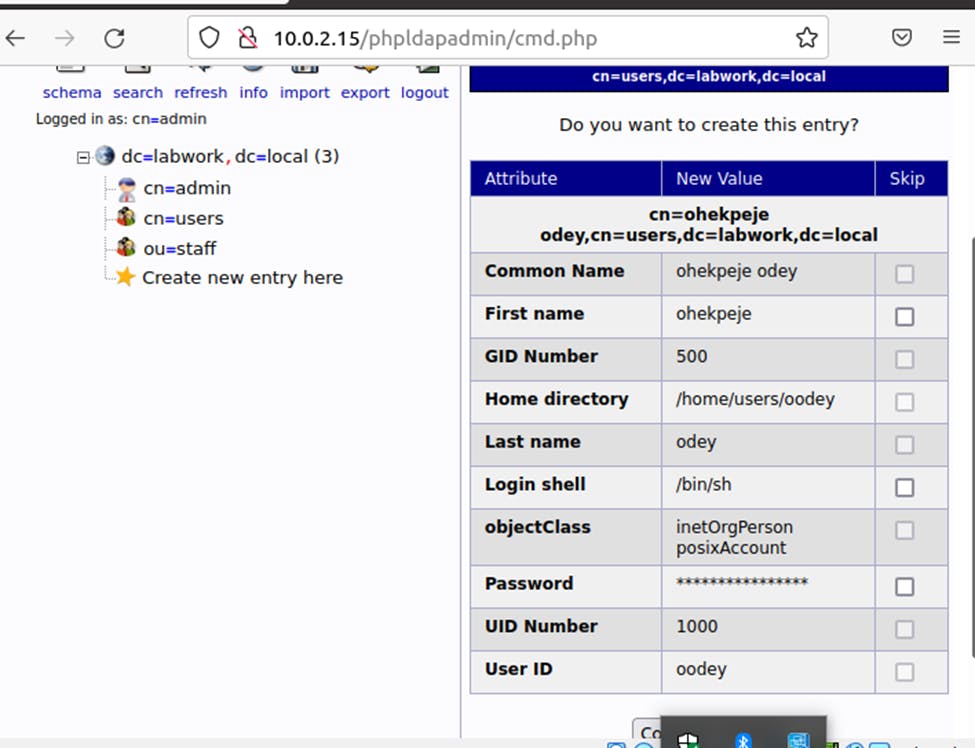
Step 1: Click on “ou=users” or “cn=staff” Step 2: Click on “create child entry” Step 3: Click on “Generic: User Account” Step 4: Add details information about the user then create user.
Conclusion.
Congratulations! You have installed and configured phpLDAPadmin on the Ubuntu 20.04 server successfully. With the phpLDAPadmin web UI, you can now manage your LDAP server and perform a variety of tasks such as adding organizational units, groups, and users.

