WordPress is open source software you can use to create a beautiful website, blog, or app. It provides users with different Templates and features to choose from when designing their blogs/site.
Azure Database for MySQL is a managed service that you use to run, manage, and scale highly available MySQL databases in the cloud.
The creation of WordPress on Azure is seamless baring any issues when creating the database. Below are the steps to deploy a WordPress site on Azure.
Firstly, navigate to the Azure Database for MySQL servers section within the Azure Portal search and click on Create Azure Database for MySQL server.
Select the Single server option.
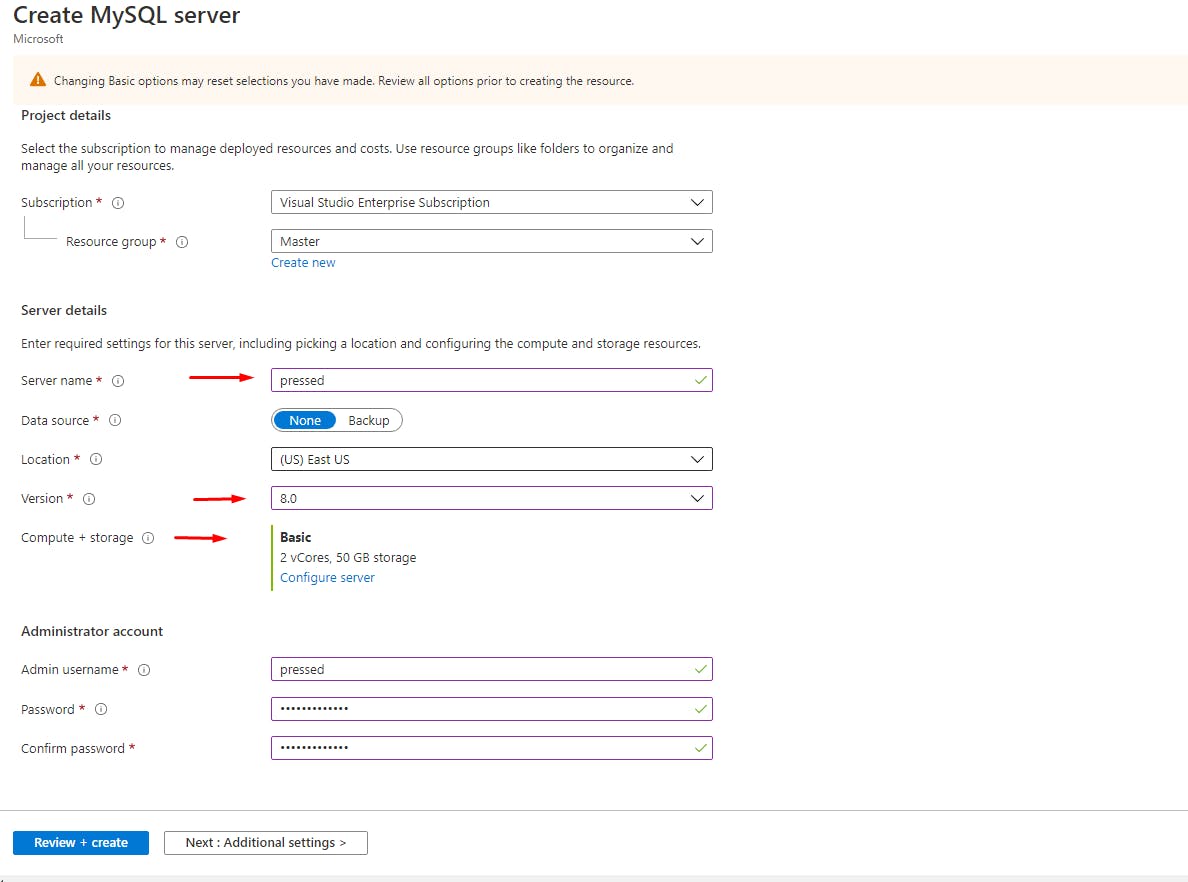
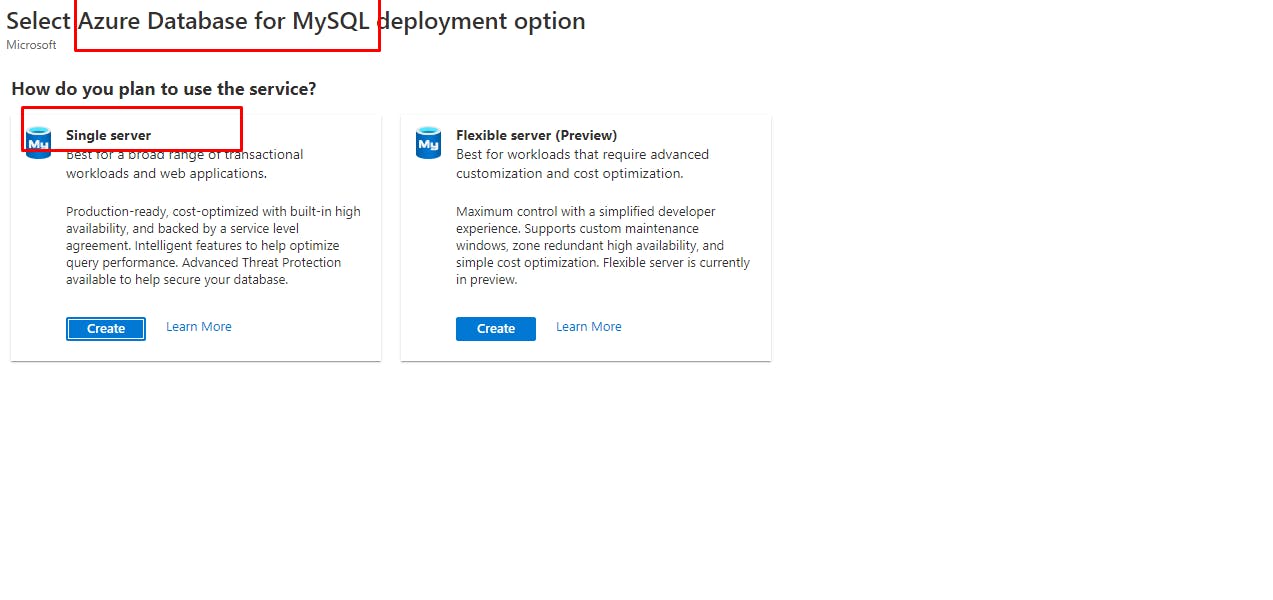 A field comes after to input the required information to provision the instance. Use the following values for guidelines.
Resource Group: The chosen resource group will contain both the MySQL database and the Web App.
Server Name: Name the MySQL instance an appropriate name, which should reflect the environment and the purpose of the instance.
Location: The geographic location will help performance if located in the region where the majority request to your site originates from.
Version: In this article, we choose 8.0, as this is the latest version of MySQL available.
Next, define an administrative username (which acts as the root user of MySQL) and an appropriately complex password.
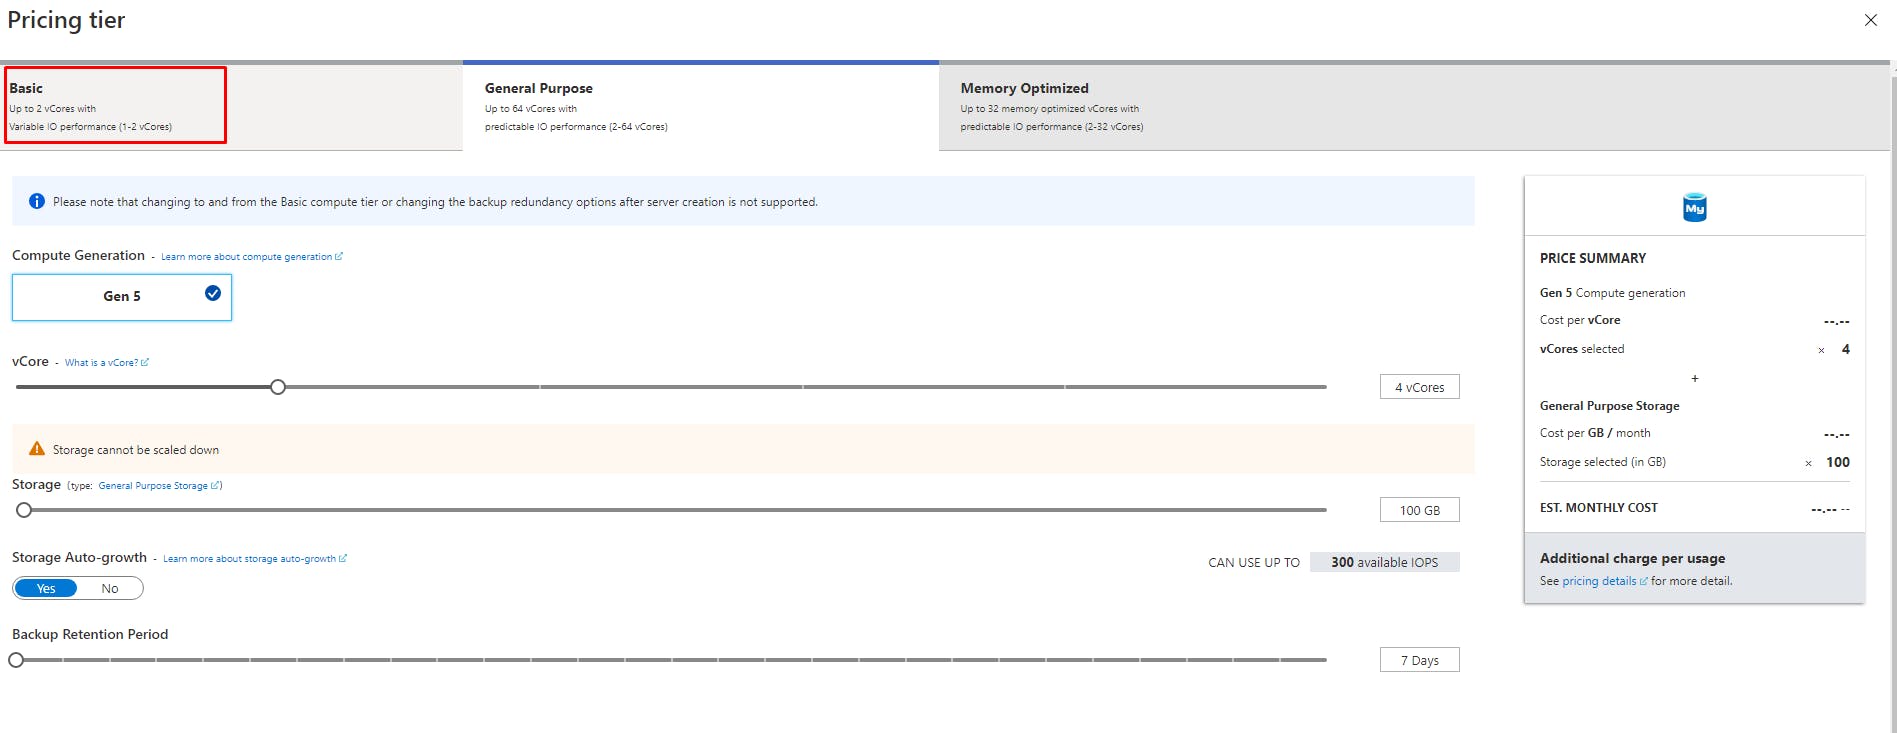
Next, we will choose the Compute + storage size, which in this article, we are working with the Basic tier with a single-core, as we want to reduce the cost.
Finally, click on Create to start the process of provisioning the managed MySQL instance.
Configuring the Azure MySQL Instance.
To ensure that Azure MySQL instance can communicate with the Web App. Following the steps also allow the creation of the necessary WordPress database.
Allowing the Necessary Traffic Through the Firewall
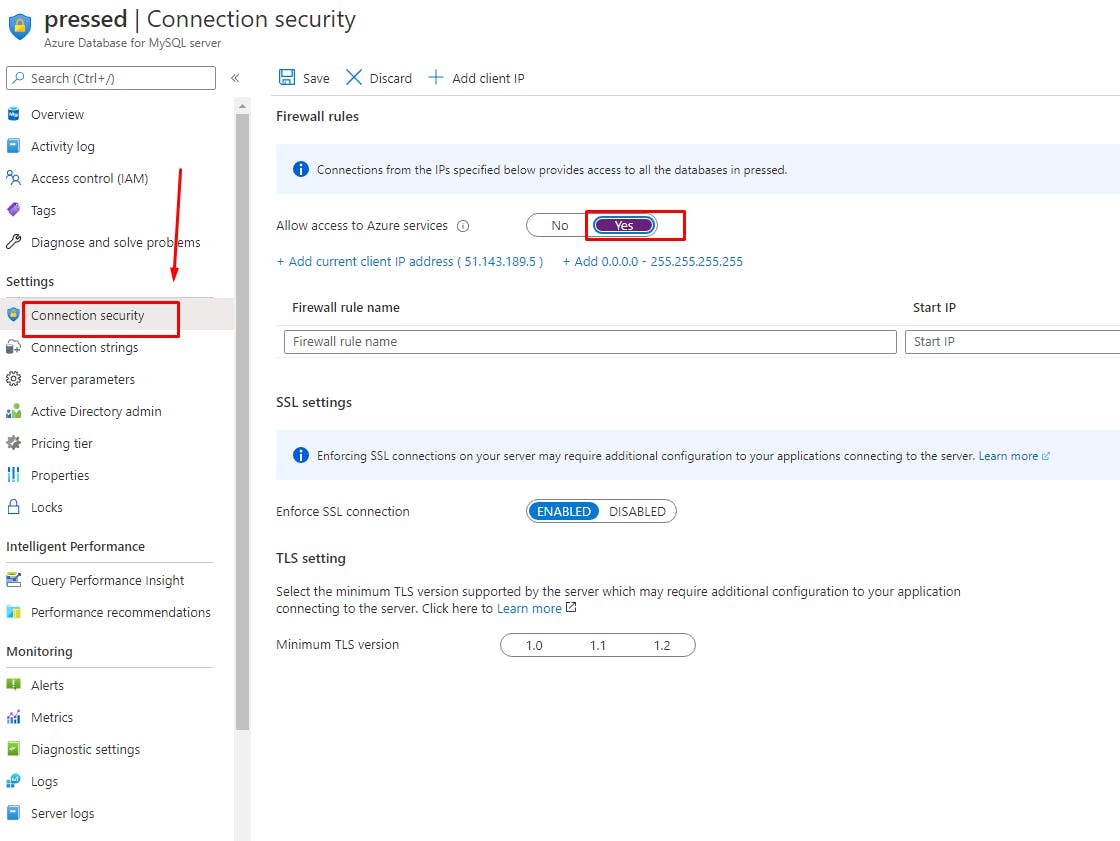
Once the MySQL instance is deployed, select the instance from the resources list, and navigate to the Connection security section. Once there, click on Add current client IP address.
We are making sure to add our client IP address to allow a third-party MySQL client to connect and create the necessary database. If you are doing this from a different client location, make sure to add that IP instead.
Connect to the Managed MySQL Instance and Create the WordPress Database.
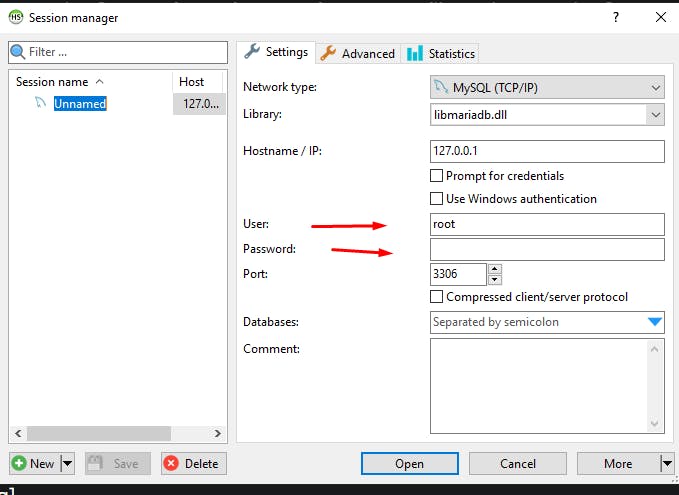
Scroll to the Connection strings section as we will need to use the Server and Uid values to connect to our database.

We would connect using HeidiSQL, a Windows application for managing MySQL databases, to create the WordPress database. We have other client tools such as MySQL Workbench, mysql.exe you can use. As you can see in the example below, we have entered the IP from the prior Server value and the User as the Uid value. The password used is the same as we created when provisioning the instance.
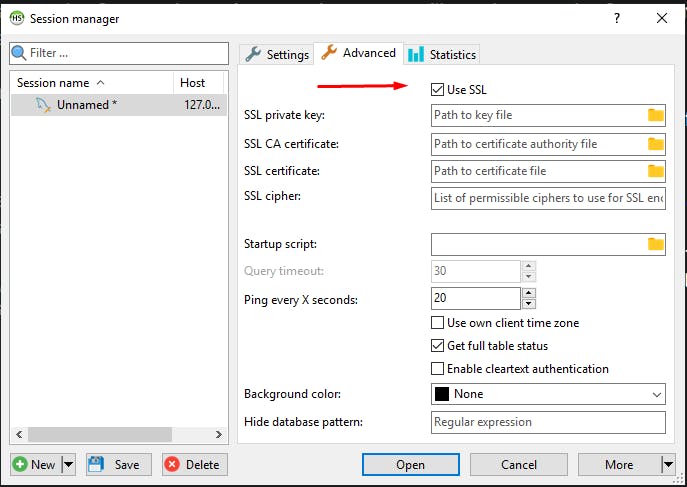
Scroll to the Advanced section and check, Use SSL, leaving all other values their default.
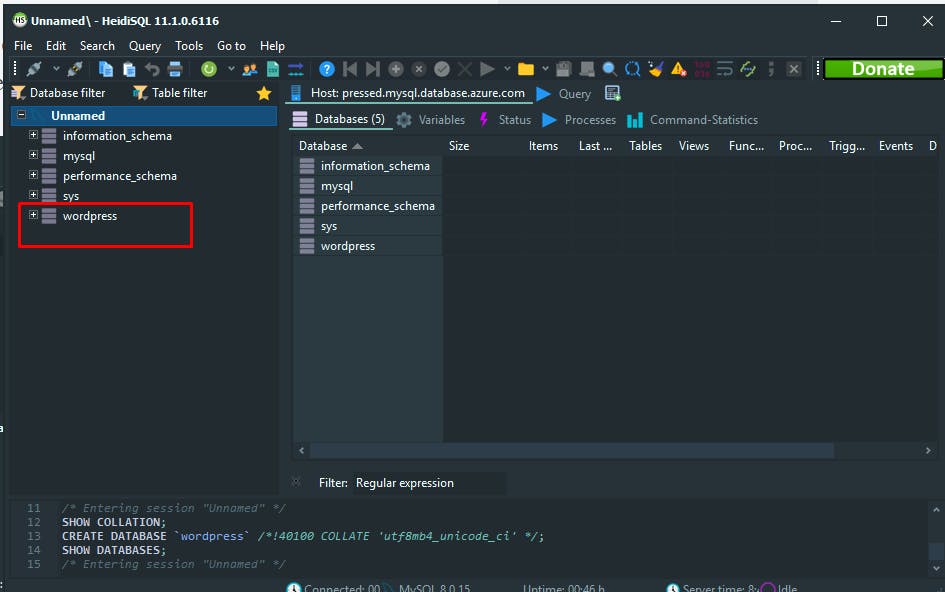
If the client-side IP is correct, that was allowed through the firewall, and all other values are accurate, then the next pane should show the default databases that are created with a new MySQL server.
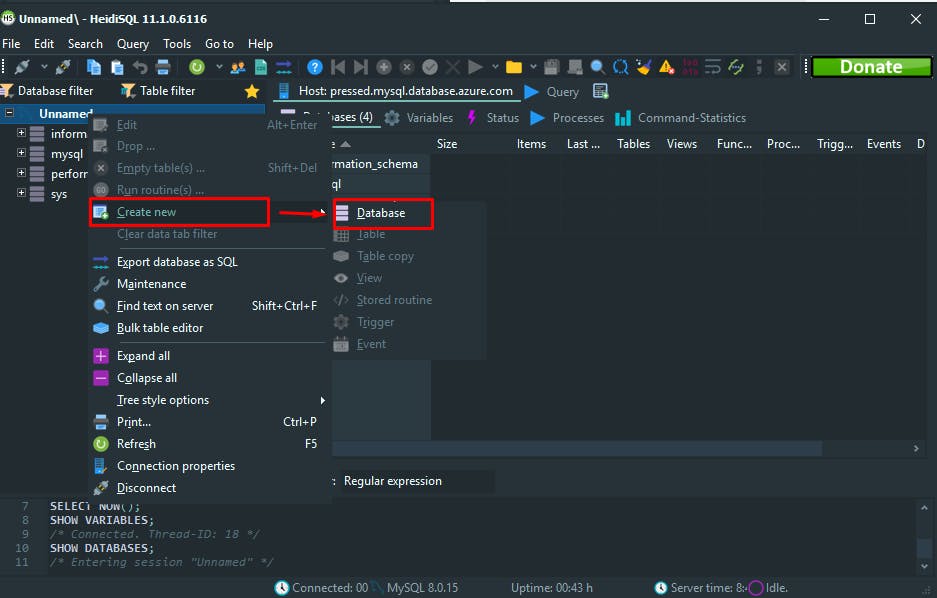
Right-click on the server, Unnamed in this example, and choose to Create new → Database.
Enter the name WordPress and choose the Collation of utf8mb4_unicode_ci, which is the preferred default for WordPress databases.
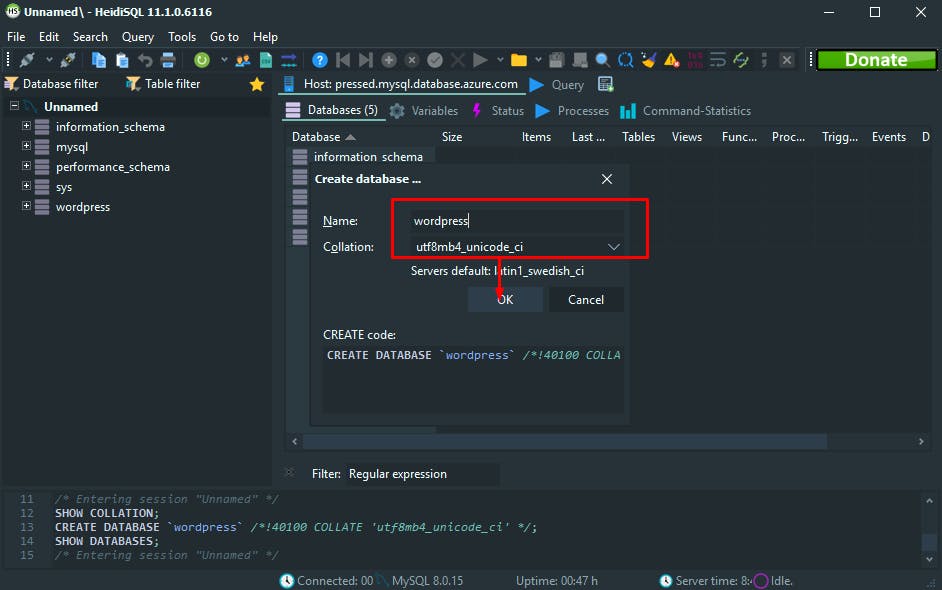
If the operation was successful, you will see a new WordPress database shown in the list.
Deploying Azure Web App.
Microsoft Azure Web App’s offer an application experience that very much decreases the management required of a traditional hosting environment. For this example, we would use the container (Docker) based approach to our WordPress hosting environment.
Deploying the WordPress Web App.
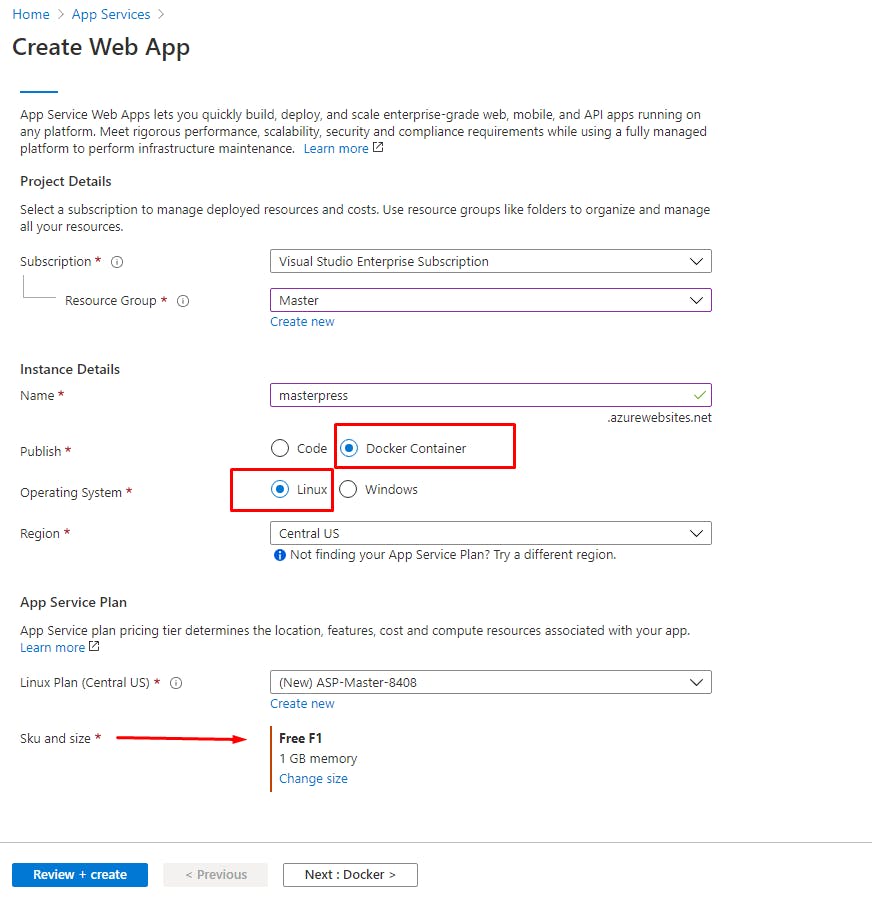
Navigate to the Azure Web App’s section and click on Create Web App. Next, we will fill in the necessary details to provision our instance.
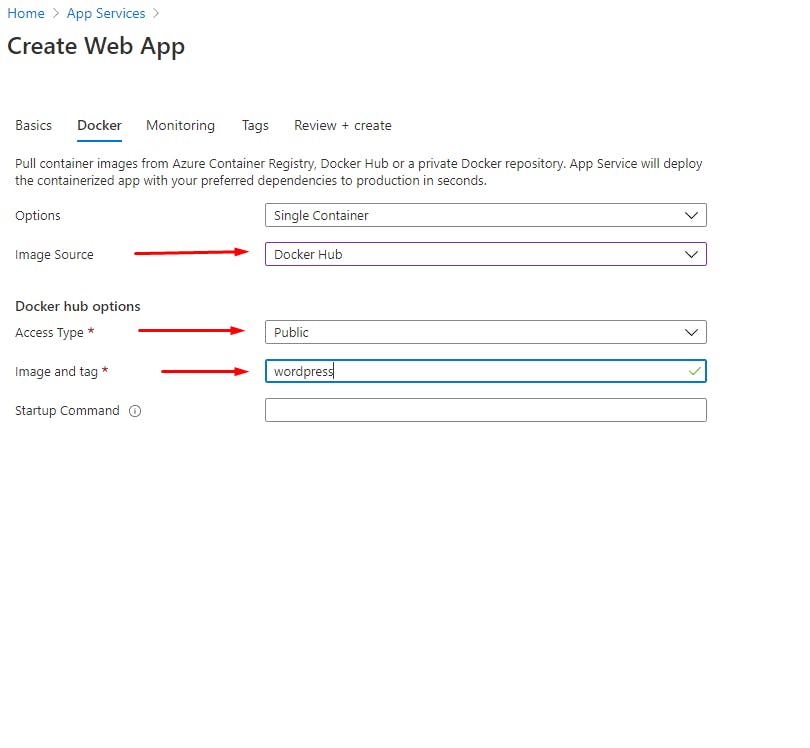
After clicking Next: Docker, we will choose the following WordPress docker container to use as the basis for our web app.
Image Source: Docker Hub
Access Type: Public
Image and tag: WordPress
Finally, click on Create to provision the Web App.
You should now have a web app up and running. This web app will be your home base for your Azure WordPress blog.
Azure Web App Configuration.
Now that the MySQL database is setup, as is the Web App, we can configure the two resources to talk to each other and finally install WordPress.
There are a few environmental configurations that work together with the WordPress container image to allow us to define what is necessary to connect the container to the MySQL database.
WORDPRESS_DB_HOST: get this from the MySQL server already created.
WORDPRESS_DB_USER: get this from the MYSQL server already created.
WORDPRESS_DB_PASSWORD: the same password used when creating MYSQL.
WORDPRESS_CONFIG_EXTRA – define( 'MYSQL_CLIENT_FLAGS', MYSQLI_CLIENT_SSL );
The idea that we are adding the additional configuration is to tell WordPress that we are using an SSL connection to connect to the database.
Navigate to the newly provisioned Web App and the Settings → Configuration section.
We are going to add in the application settings as defined above, and as you can see below.
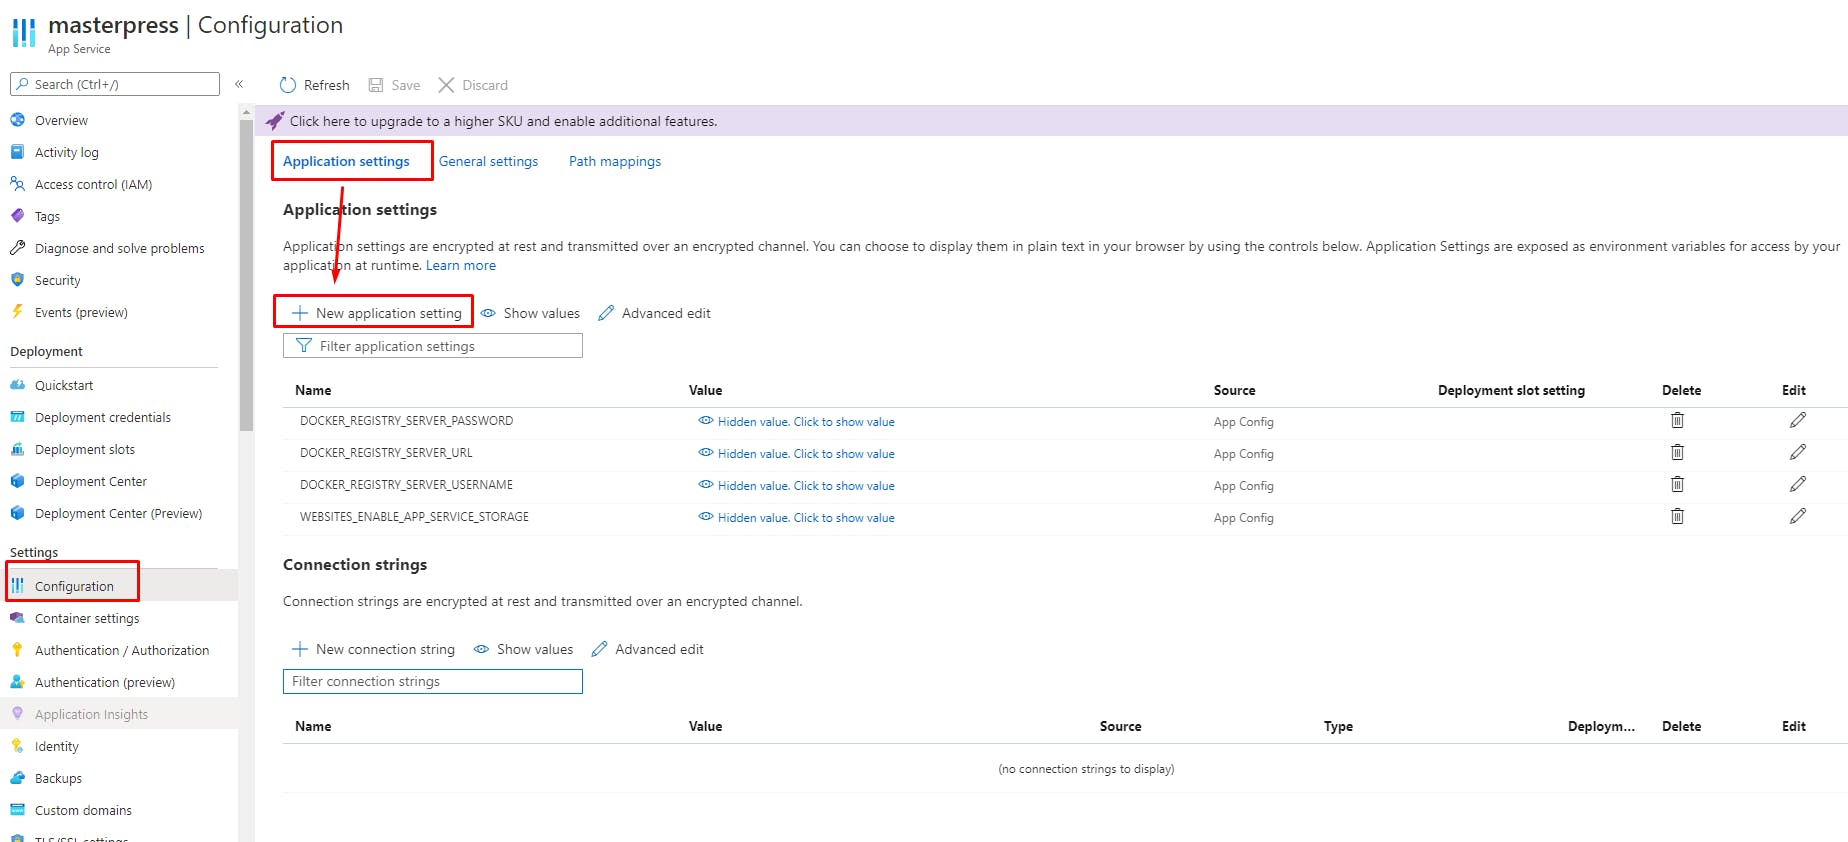
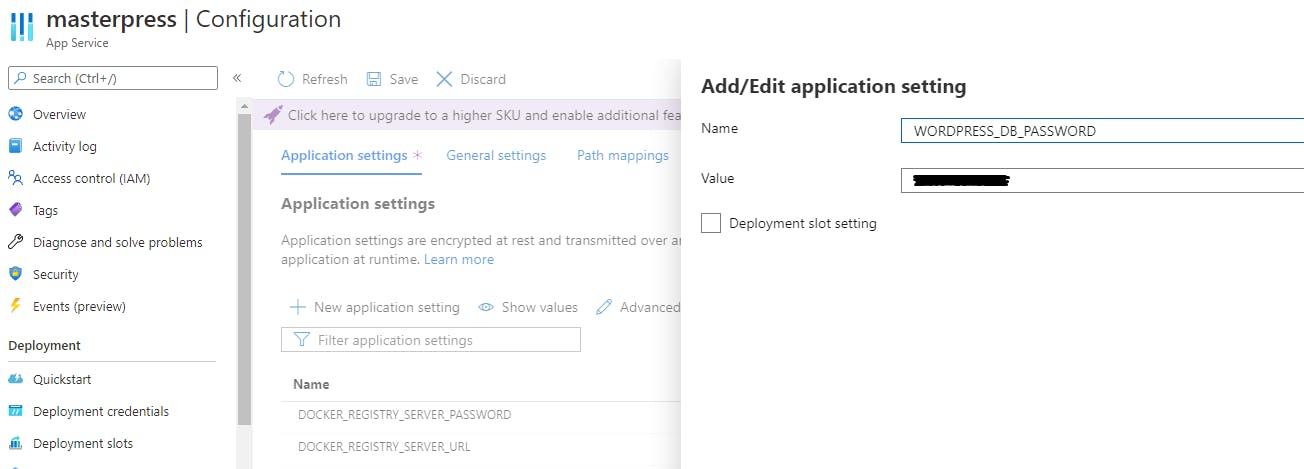


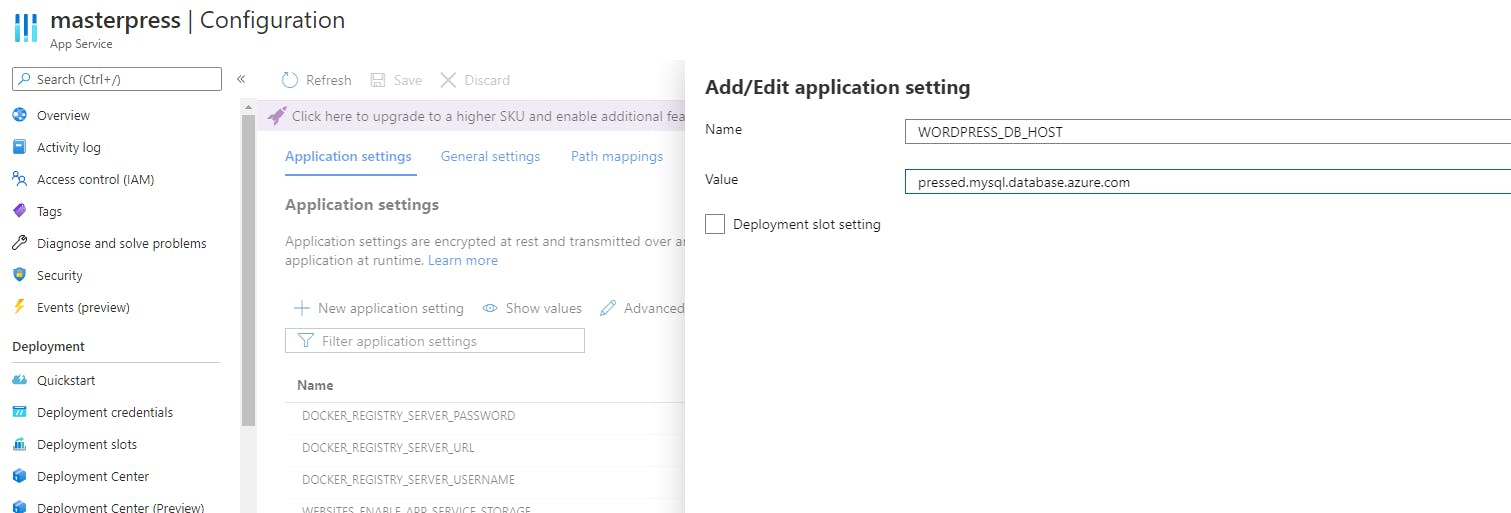
After you click Save, the Web App will restart and use those settings when re-deploying the WordPress container image. Now onto actually installing WordPress in Azure.
Installing WordPress in Azure.
The final steps will demonstrate that WordPress can function and work with the Azure Managed MySQL instance.
Navigate to the public URL of your Web App.
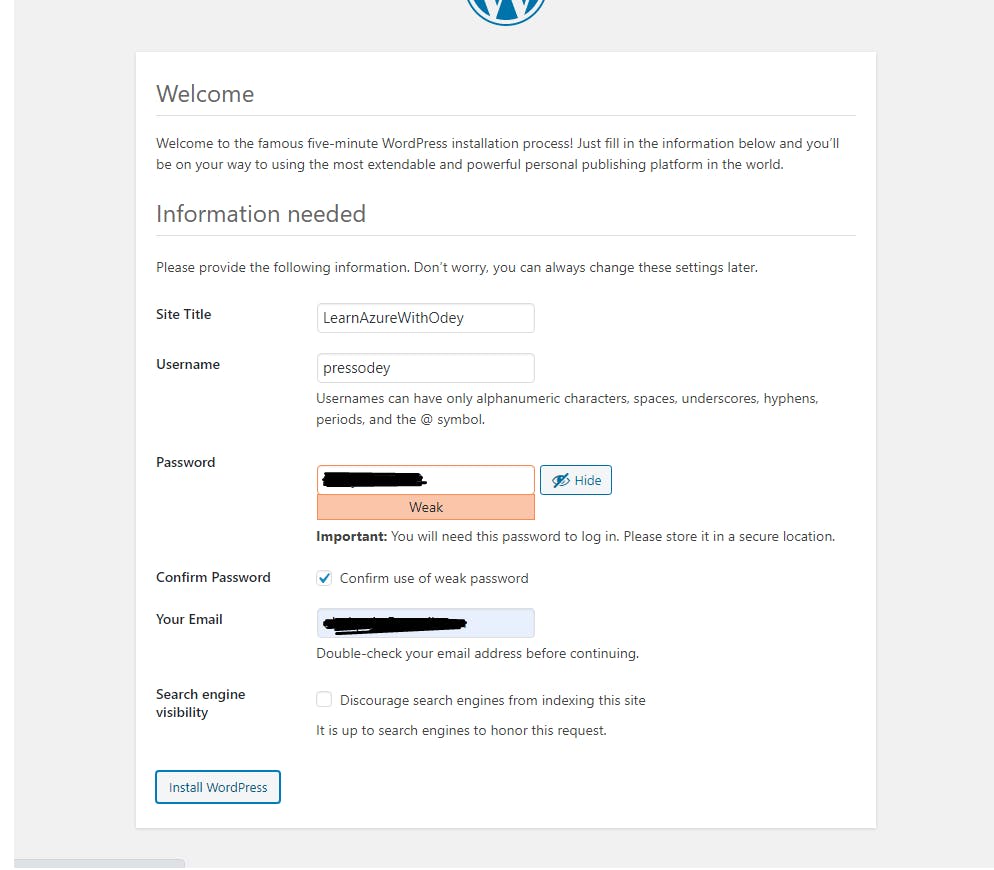
On the first visit, if everything is functioning, you should be presented with the standard WordPress installation screen.
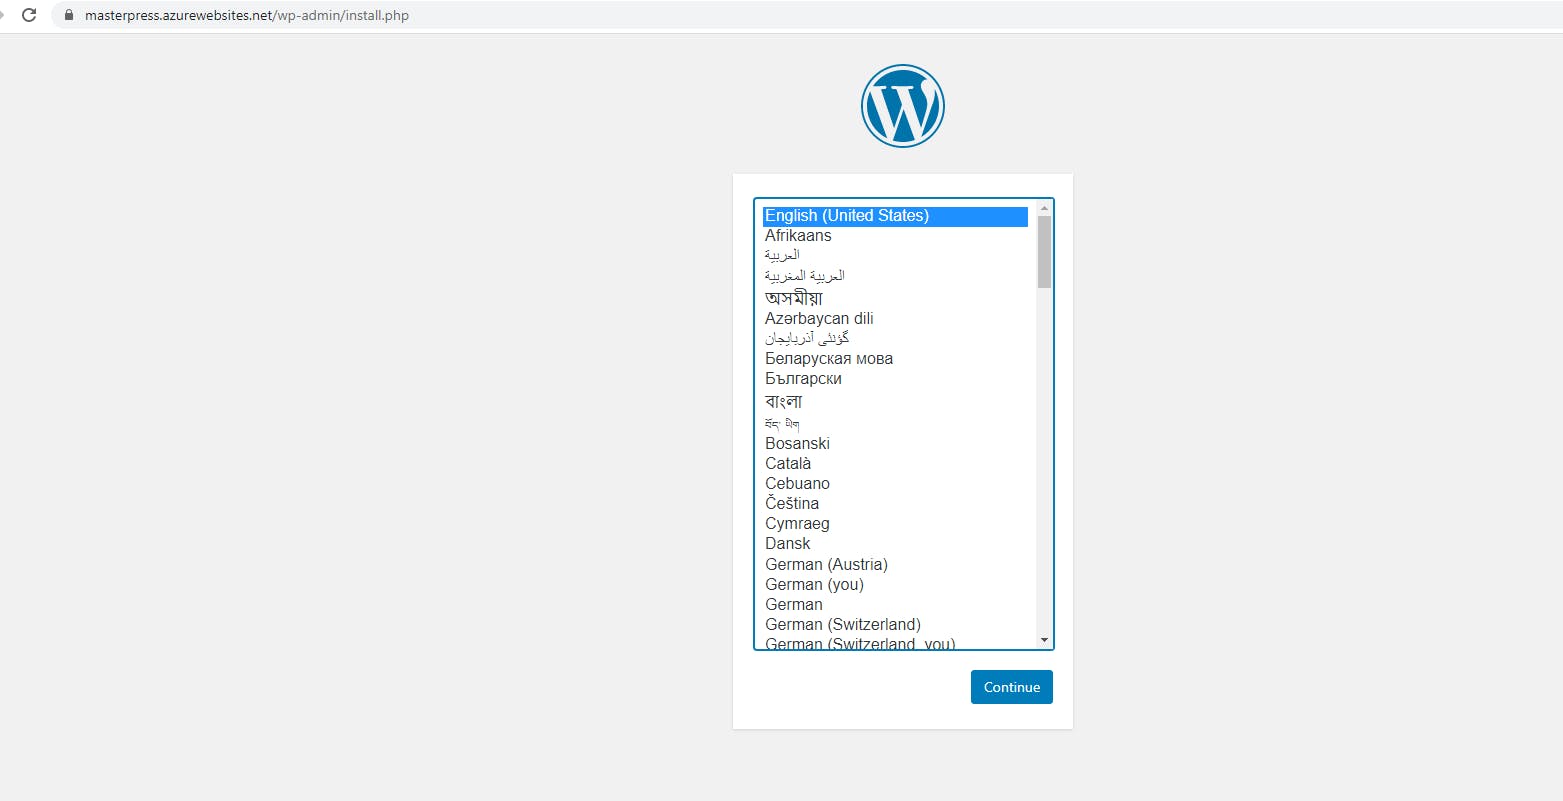
Enter the required installation information and click on Install.
If the installation succeeded, you will see a Success page.

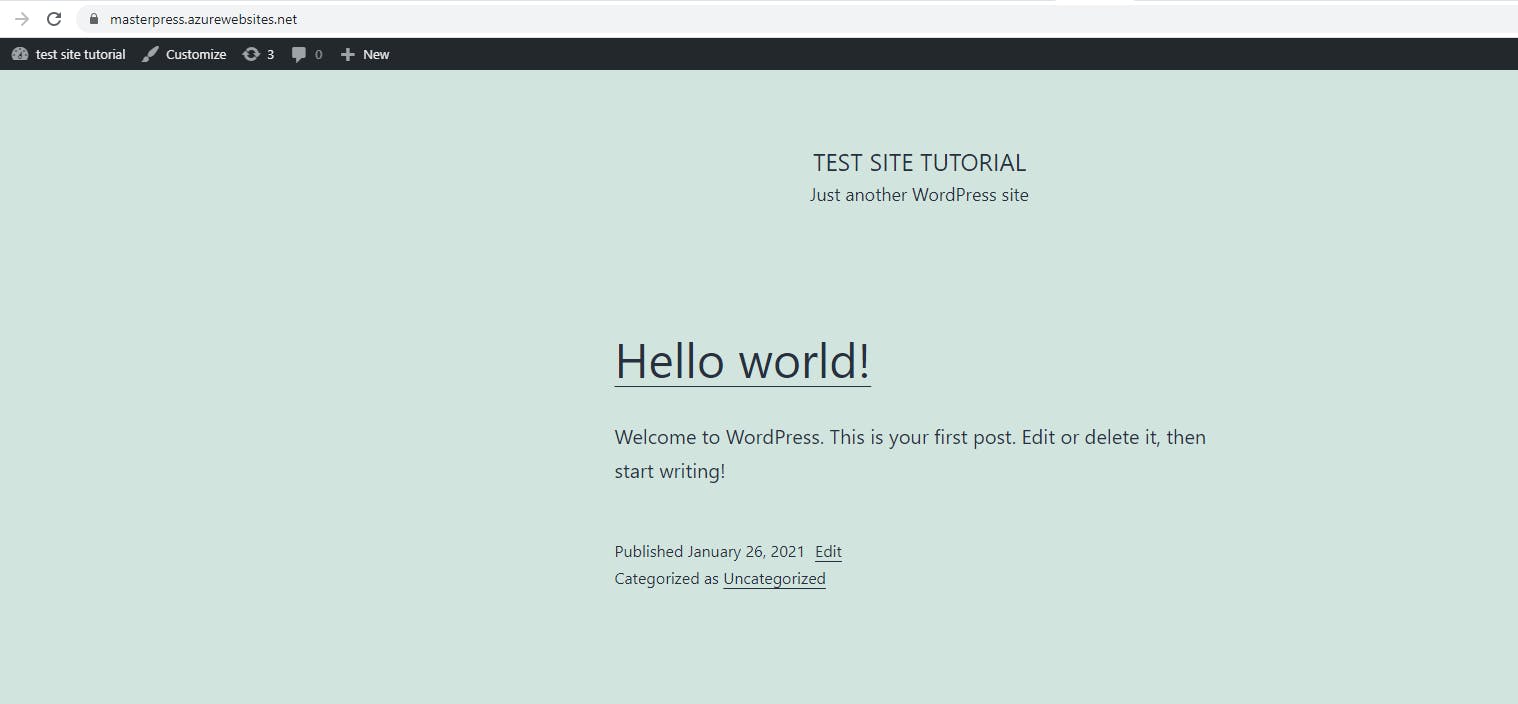
Finally, navigate to the public URL and the browser should now show the default theme and hello world placeholder text.
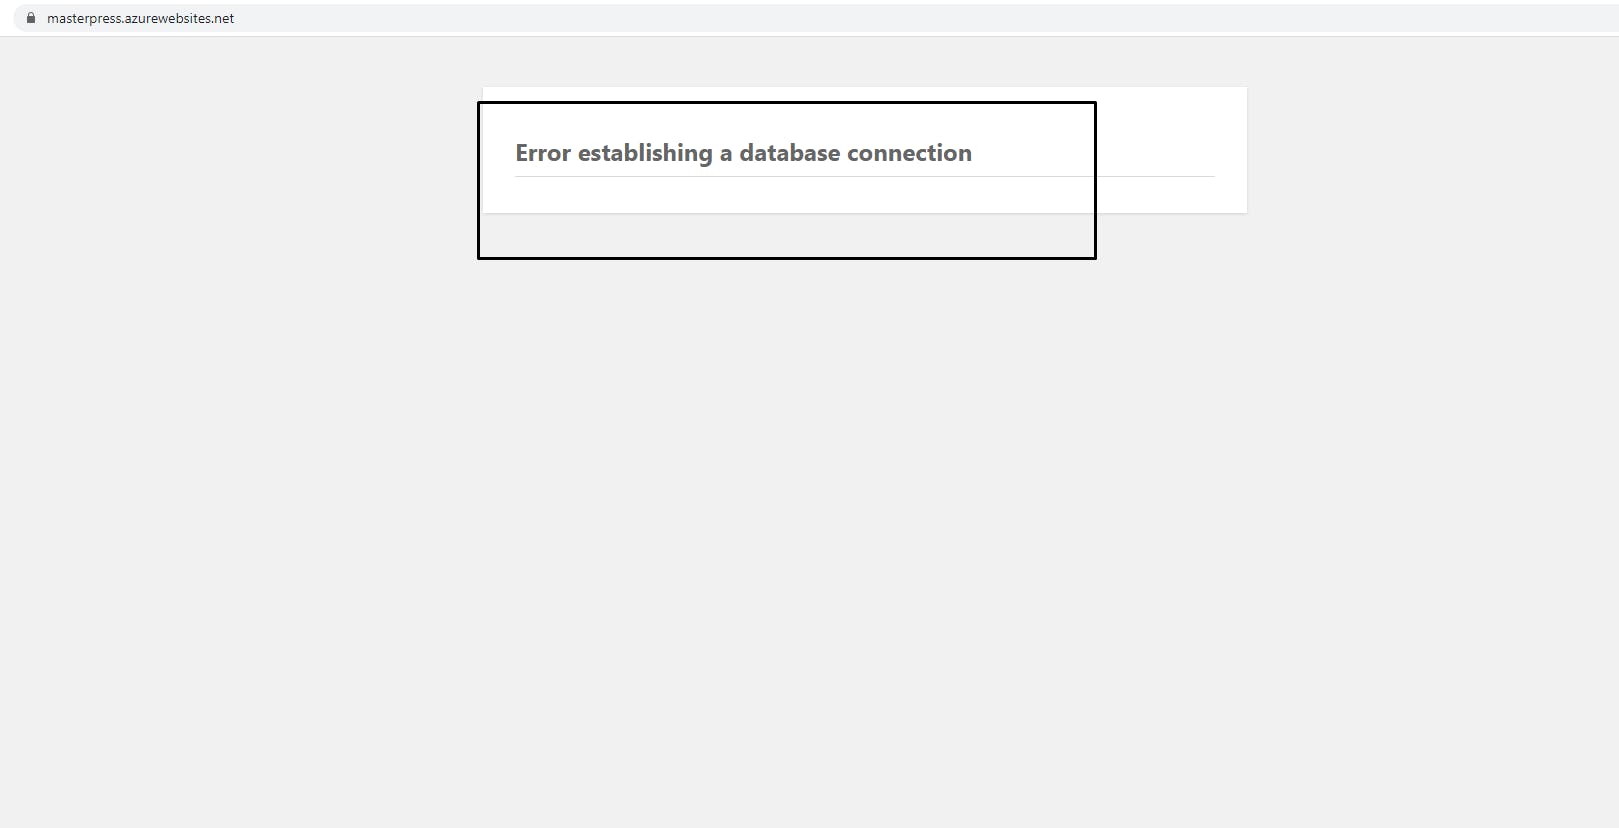
NOTE: When creating connecting the MySQL instance to the WordPress database and you use a different name instead of WordPress, you would encounter the error below when accessing with the public URL of the web app.
Conclusion.
With the steps provided, you can create, manage your MySQL database and azure web app at an affordable price on the Azure platform. Give it a try and let me know what you think.

